
 When World Bread Day came around last year, this blog didn't even exist. It is the product of my obsession with baking bread...I think of it as an adjunct to my original blog, Feeding My Enthusiasms. I was just at the beginning of my sourdough starter journey last October. Although I had baked yeasted breads in the past, I didn't think of myself, at all, as a bread baker. Poor Xam wasn't yet the Bread Baker's Dog. He is sure glad that I'm now a regular bread baker :)
The ROUNDUP can be found at 1x umruhren bitte.You can go there to learn more about World Bread Day and Bread Baking Days, too.
A constant source of inspiration is the Yeastspotting event, mostly hosted by Susan at Wild Yeast blog. Every week there are wonderful yeasted breads, rolls, flatbreads, sweet breads and more.
Now that my sourdough starter from last October has gone bad, I'm making a new one, but that means that I'm using packaged yeast for recipes this month. With the holidays coming up, I've been spending time looking at The Festive Bread Book by Kathy Cutler. That is where I saw the illustration for making this bread, although I chose to use a different bread dough. This is a fun one ladies and gents...like playing with clay, only it's softer.
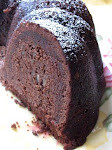
 A third of the dough was used in a bodacious chocolate and vanillia swirled snail loaf. That recipe can be found here on Feeding My Enthusiasms blog.
 See that line of white milk bread? It sure helps temper the richness of all that chocolate!
The other two thirds were used for this lovely, soft and sweet milk bread for World Bread Day!
 Harvest Sheaf
This bread is shaped like a sheaf of wheat. It would make a great addition to a fall buffet table or for Thanksgiving breakfast or dinner.
 With quince jelly and a little butter, it is amazing!
I used 2/3 of the Milk Bread recipe from The Italian Baker by Carol Field to make the Harvest Sheaf. You can find the recipe at the bottom of this post and also, along with one for a yummy Chocolate Bread, HERE.
 Shaping the Harvest Braid (diagram and recipe at the bottom of this post):
Make the Milk Bread dough as it is given in the recipe.
After the first rising, punch the dough down. You have to approximate the amount of dough needed for each of the following, but the Milk Dough is so easy to work with that you can pinch off some if you have too much or add a bit from another ball of dough if you don’t have enough.
Roll dough into ropes, each about ½ inch thick: four 5-inch ropes, eight 13-inch ropes, eight 16-inch ropes. You may need to make the longer ropes 10 inches and 13 inches respectively … by the time I was making this bread I wasn’t into measuring…I just made eight long ones and eight shorter ones, plus the four very short ones became three very short ones.
Start by putting a silicone mat or parchment paper on a large baking sheet.
The first layer has the ropes touching, starting from the center and moving left and right, with a bend about a third of the way down, four bending one way and four the other.
The next layer has six of the shorter ropes, touching, placed on top of the first set of ropes, half of the ropes bending one way and half the other, about a third of the way down from the top.
The final two ropes are placed on top of that with one bending one way and the other bending the opposite way. I think I actually put one of the long ones almost upright to fill in the sheaf top. I think I spread mine out too much, so the top was pretty, but seemed too flat in comparison to the stacked bottom part.
 Take the four (or three) short ropes and twist them together (two twists if you have four ropes, one twist of three strands if you have three like I did). Place the twisted rope across the ‘sheaf’ about half way down. As if it were securing the sheaf together. Tuck the ends under.
Take sharp scissors and snip along the bent portion of the stalks to simulate wheat grains.
Cover and let rise in a warm place until double – about 30 minutes. Make glaze of one egg beaten with 1 tablespoon of water. Brush over the whole loaf.
Bake in a preheated 375 degree F oven for about 25 – 30 minutes or until golden brown. Cool on a wire rack.
This bread is slightly sweet and milky and very mild in flavor. It is great with butter and jam.
Milk Bread
SPONGE:
1 ¾ teaspoons dry yeast or 2/3 small cake (12 grams) fresh yeast
1 tablespoon sugar
½ cup warm milk
1 cup less 1 tablespoon (130-135 grams) unbleached all-purpose flour
Stir the yeast and sugar into the milk in a large mixing bowl or mixer bowl; let stand until foamy, about 10 minutes. Add the flour and whisk vigorously to make a thick batter. Cover and let stand until doubled, less than 1 hour.
DOUGH:
1 egg 1 tablespoon rum
1 cup milk, room temperature
½ stick (55 grams) unsalted butter, room temperature
2 ¾ cups (175 grams) unbleached all-purpose flour
1 teaspoon (5 grams) salt
Add the egg, rum, milk, and butter to the sponge and mix with the paddle for about 1 minutes. Add 1 cup of the flour and the salt and mix on low speed. Change to the dough hook and add the rest of the flour and knead until soft, silky and elastic, 3 – 4 minutes once the flour is incorporated. Finish kneading briefly by hand on a lightly flour surface.
Place the dough in a lightly oiled bowl, cover tightly with plastic wrap, and let rise until doubled, 1 to 2 hours. The dough should be very soft but slightly tacky, and if you pinch the surface, the little peaks of dough should hold their shape.
Cut the dough into three equal pieces. Take one of the pieces and use it for the Chocolate-Vanilla Swirled Snail Loaf, found HERE, or make a round loaf with it, pulling the dough under to form a 'skin', then cover with plastic wrap and let rise until doubled. Bake it along with the Sheaf, on a separate baking sheet.
Form the Harvest Sheaf with the 2/3 left, using this diagram and the instructions above.

WoW! That's amazing!This would make a wonderful gift as well, thanks for the diagram!
ReplyDeleteThank you for this wonderful post and thank you for your participation in World Bread Day 2009. Yes you baked! :-)
ReplyDeleteThat is beautiful. Thanks for taking the time to write such great directions. I could see it for thanksgiving.
ReplyDelete