 The Bread Baking Babes usually come up with great bread recipes to bake. I don't always have the time between when they post and when a "Buddy" post needs to be up, but this time I did.
I woke up early today and decided to quietly peel and boil some potatoes for the mashed potatoes so that they would be cool for later baking. The house smelled great and it smelled even better when I baked the bread for dinner.
In between was a lot of running around looking at shower door samples and getting paint chips and getting shower stall samples and looking at vanities and sinks and mixer valves. Fun, but time consuming. The dough that had been left to rise at noon when we were just going a ten minute drive away to pick up a window turned into many hours gone. Fortunately this dough didn't seem to suffer from my neglect. I used about twice as much chives as the recipe called for. No soy milk in the house, either, so I used 2%. For the water at the beginning of the recipe I used the water that I had cooked the potatoes in, although it had cooled down.
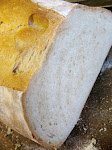
The two smaller loaves I made baked up beautifully. The crust was golden and had a nice crackle. The interior crumb was fine and moist and very flavorful. I'm afraid that Sweetie ate about a third of the loaf while it was still warm...and who can blame him?
 I'm going to try some toasted tomorrow morning. Bet it would be great with some cream cheese.
Thanks to Sara for choosing this great bread. My dough was a bit sticky but that's what bench scrapers are for. The contrast between the crisp crust and moist interior was really great! I did brush a little beaten egg over the loaves just before I slit the tops. Gives them a nice color and shine.
The recipe below includes my changes. For the original recipe and to become a Bread Baking Babes Buddy, go to Sara's blog, I Like to Cook.
 Potato Bread with Chives
adapted from Vegan Planet by Robin Robertson
"The addition of mashed potatoes gives this bread a moist, dense texture and delicate flavor that is accented by that of the chives. This bread is best eaten slightly warm from the oven on the day it is made. It is also good toasted."
2 1/4 tsp (1 packet) active dry yeast
1 cup warm water that the potatoes were cooked in
1 tsp pure maple syrup
2 Tb safflower oil
2 tsp salt
1 cup cold mashed potatoes
1 cup 2% milk
5 cups unbleached all purpose flour, plus more for kneading
¼ cup minced fresh chives
1 egg, beaten
In a large bowl, combine the yeast and 1/4 cup of the potato water. Add the maple syrup and stir to dissolve. Let the mixture stand for 10 minutes, then stir in the remaining 3/4 cup of potato water, the safflower oil and the salt. Mix in the potatoes, then stir in the milk. Add about half the flour, stirring to combine, then work in the remaining flour to form a stiff dough. Transfer to a lightly floured board.
Lightly flour your hands and work surface. Knead the dough well until it is smooth and elastic, 8 to 10 minutes, using more flour as necessary so the dough does not stick. Place in a large lightly oiled bowl and turn over once to coat with oil. Cover with a clean kitchen towel or lightly oiled piece of plastic wrap. Let rise in a warm place until doubled in bulk, 1 to 2 hours.
Meanwhile, lightly oil a large baking sheet and set aside. Punch the dough down and knead lightly. Turn out onto a lightly floured work surface, sprinkle with the chives, and knead until the dough is elastic and the chives are well distributed, 3 to 5 minutes. Shape the dough into one large or two small round loaves and place on the prepared baking sheet. Flatten slightly and cover with a clean damp towel or lightly oiled plastic wrap. Set aside in a warm place and let rise again until doubled in bulk, about 45 minutes.
Preheat the oven to 400'F. Paint the loaves with beaten egg. Use a sharp knife to cut an X into the top of the loaf or loaves. Bake on the center oven rack until golden brown, 35 to 45 minutes, depending on size. Tap on the bottom of the loaf or loaves - if they sound hollow, the bread is done. Remove from the sheet and let cool slightly on a wire rack before slicing.


